Overview
In this learning activity, students will create a grid using nested for loops.

Overview
In this learning activity, students will create a grid using nested for loops.
Suggested Duration
45 minutes
Objectives
Students will be able to:
Student Outcomes
Algorithms:
Prototype:
Vocabulary
| Loops | A sequence of instructions that is repeated until a certain condition is met. |
|---|---|
| Iterations | The repetition of a process or utterance. |
| For Loop | The for loop loops through a block of code a specific number of times |
| Nested Loop | one loop is running inside of another loop |
Resources
Add A Column To Your Row
In a previous lesson, we drew rows and columns using for loops. Here is an example of how we accomplished that using multiple for loops. The first for loop increments the x position creating a row of ellipses and the second loop increments the y position creating a column of ellipses.
Exercise #1: Draw A Grid With Multiple For Loops
Try creating a grid using the method that we used in the past. You can start with a row and just a few columns, just to get an idea of how tedious it would get to program each column separately. In the example below I drew four columns and the code is already pretty long.
If we think about it, we want to draw a column of circles for each of the circles in our row. When x=20, we want to draw a column at 20, when x= 40, we want to draw a column there too. Take a look at this animation: each time we draw a circle in the top row (with y = 60), we also draw another two (with y = 90 and y = 120): x is incrementing by 30, and each time 30 is added to x, a column is created as well with y incrementing by 30 until it reaches the height of the canvas.

Nested Loops
There is a short and easy way to do this in code with a “nested for loop.” A nested loop means one loop is running inside of the other loop.
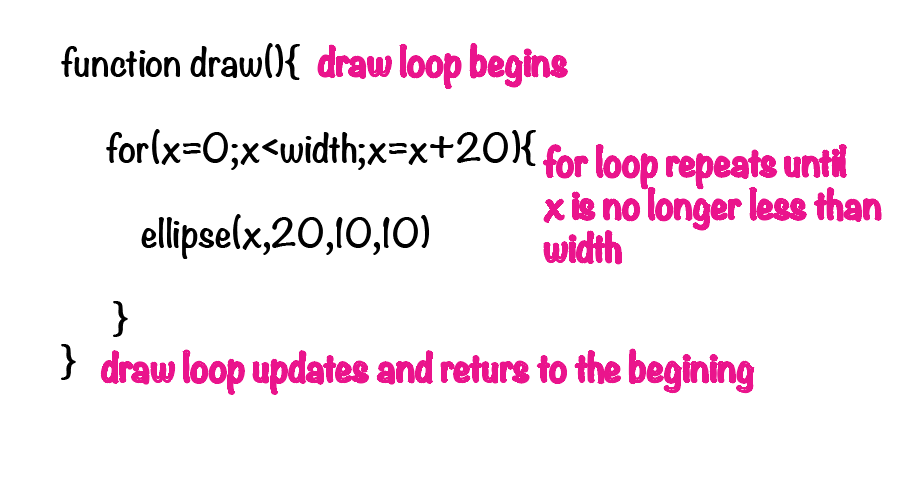
We’ve actually seen this before. We are running a for loop inside of a draw loop. The for loop repeats a block of code, and the draw loop repeats all of the code that is inside it as well. That’s how we created our drawing app. The draw loop would run again and again and redraw our ellipse in the location of our mouse.
You might think that if this is the case, when we draw ellipses in a for loop, we should see the ellipses being drawn one at a time (like the animation above) because an ellipse should only be drawn once every time the draw loop runs, but in fact the draw loop only updates once everything inside of it has been run, including the entire for loop.
If we nested a for loop inside of another for loop, the same concept would apply. The nested loop would run until completed each time the exterior loop is run. In the example below we draw an ellipse at an x location with the variable x and a y location with the variable y. X is incremented by 30 in the outer for loop (which will draw a row) and in the inner for loop, y is incremented by 30 (which will draw a column).
Each time the x loop is run, it draws an ellipse in the row, as well as an entire column at that x location as illustrated by the animation above. Since this canvas is 120 pixels high, and three ellipses will be drawn per column before the condition y < width is no longer true and the loop is completed, the inner loop will run three times for every one time that the outer loop is run.
The first time the outer for loop runs, x is 30. Then the inner for loop runs. y starts at 30. A circle is drawn. y is set to 60. The second circle is drawn, 30 px below the first. Then y is set to 90, and a third circle is drawn, 30px below the previous one. Now the inner for loop is done, the outer loop sets x to 60, and the cycle continues.
It’s ok if the concept doesn’t click right away. You can still use the formula to create grid systems in your code.
Exercise #2: Use A Nested For Loop To Turn Your Design Into A Grid