
Overview
In this learning activity students create HTML elements using Javascript: a paragraph, a header, and of course their canvas.
Overview
In this learning activity students create HTML elements using Javascript: a paragraph, a header, and of course their canvas.
Introduction
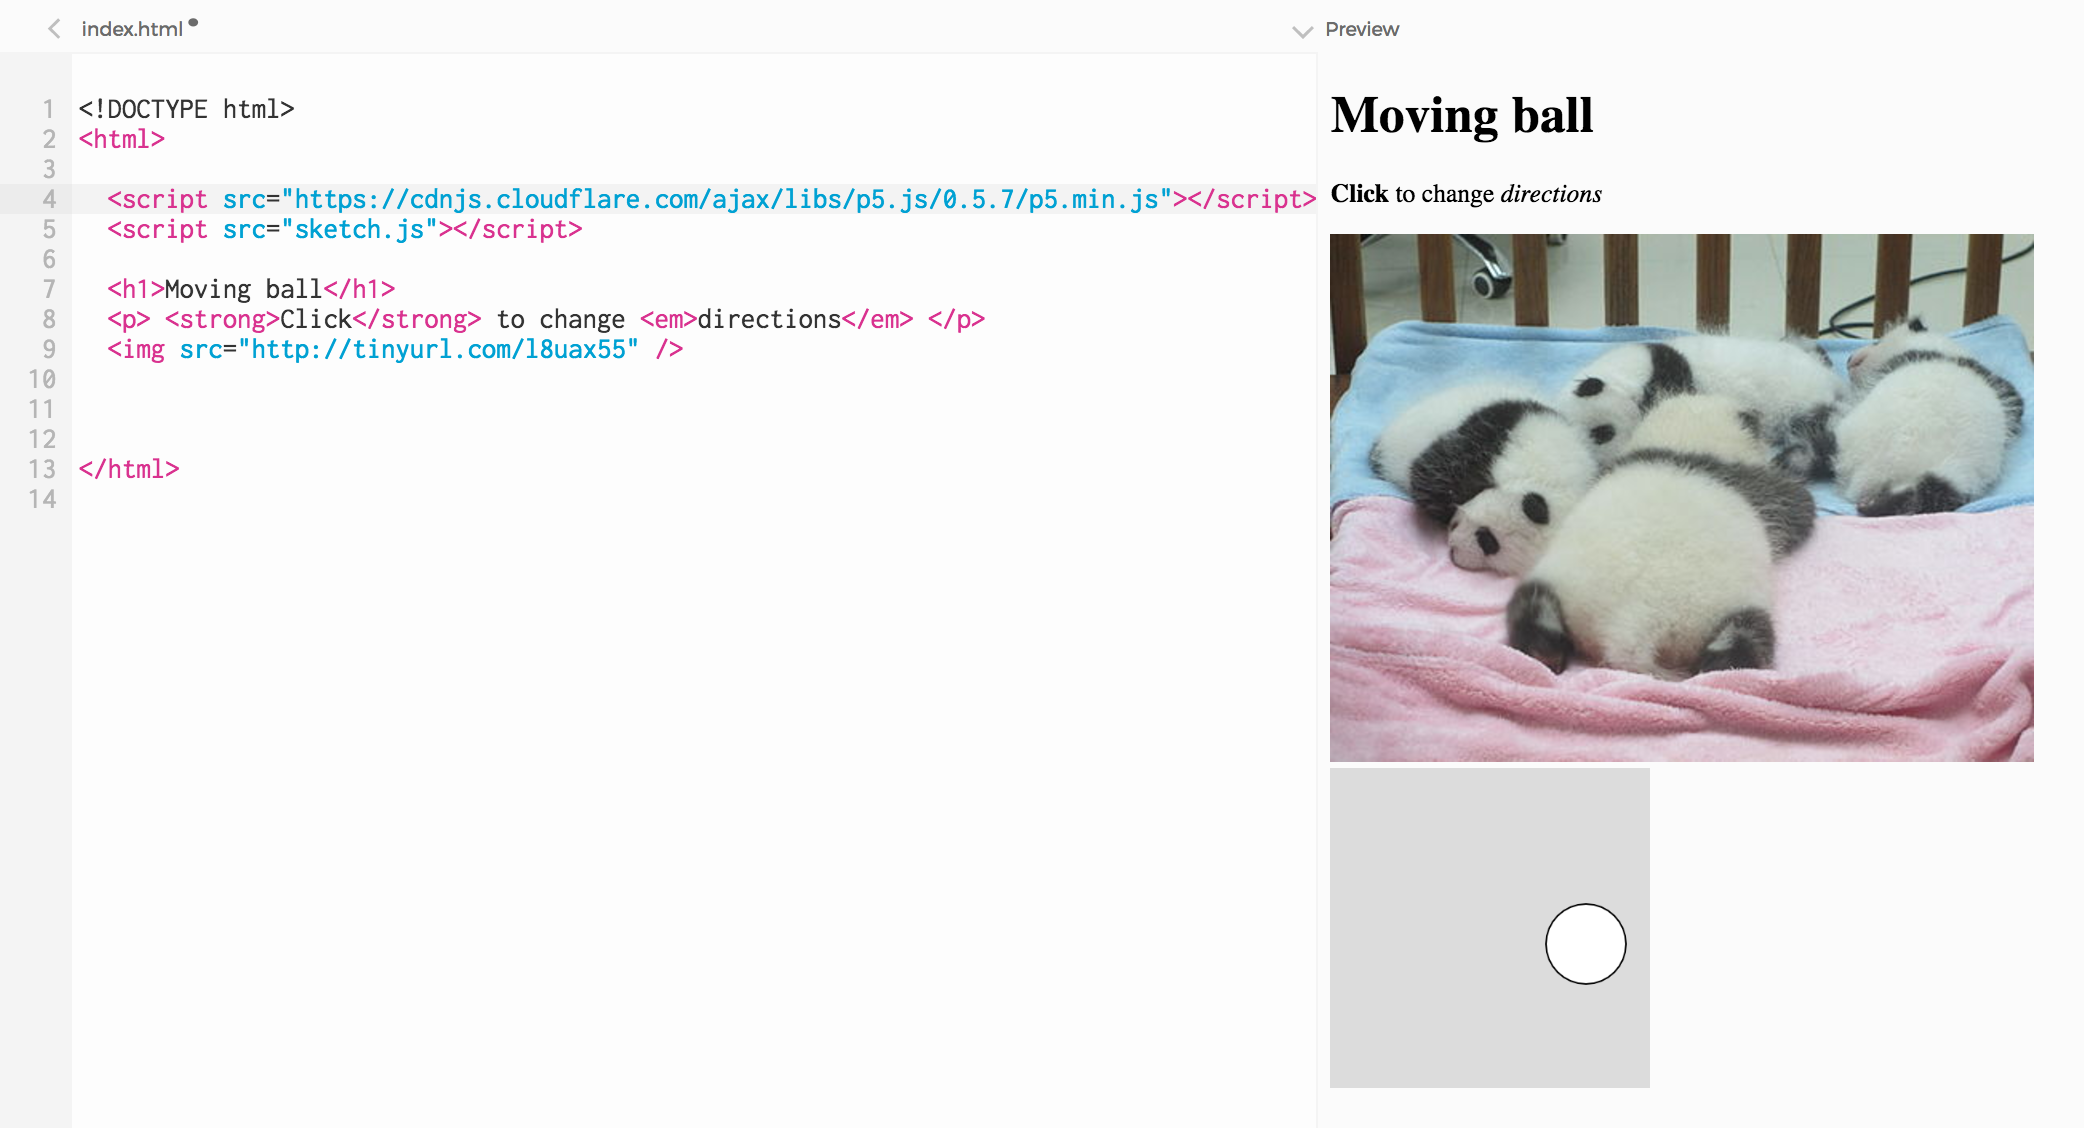
In the previous Learning Activity we learned how to add HTML elements to a web page by writing tags into index.html. We also added an HTML element to the page by calling a Javascript function (the canvas):
But how exactly do HTML and Javascript work together? Let's take a closer look at what the browser does when we hit 'play' in the p5 editor.
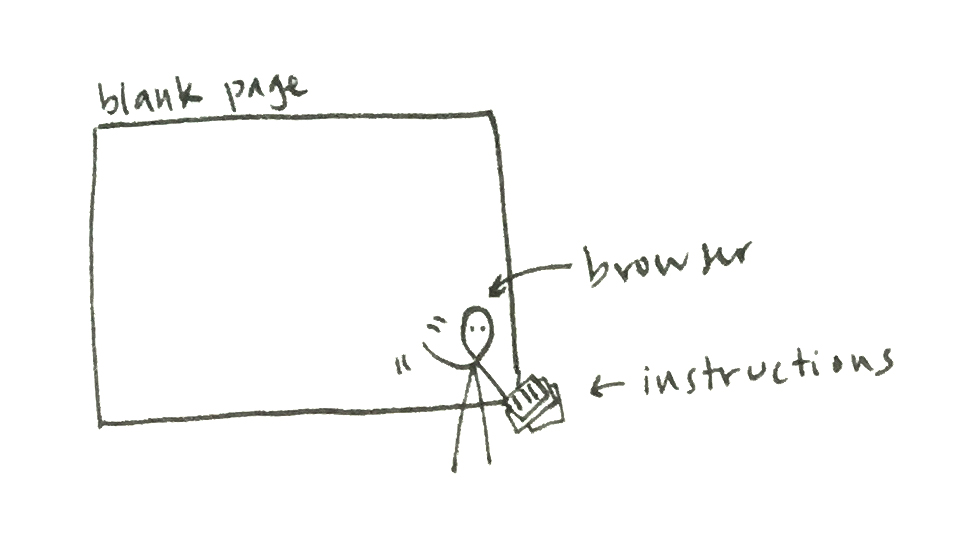
The browser starts with a blank page and a file with instructions for it: index.html.
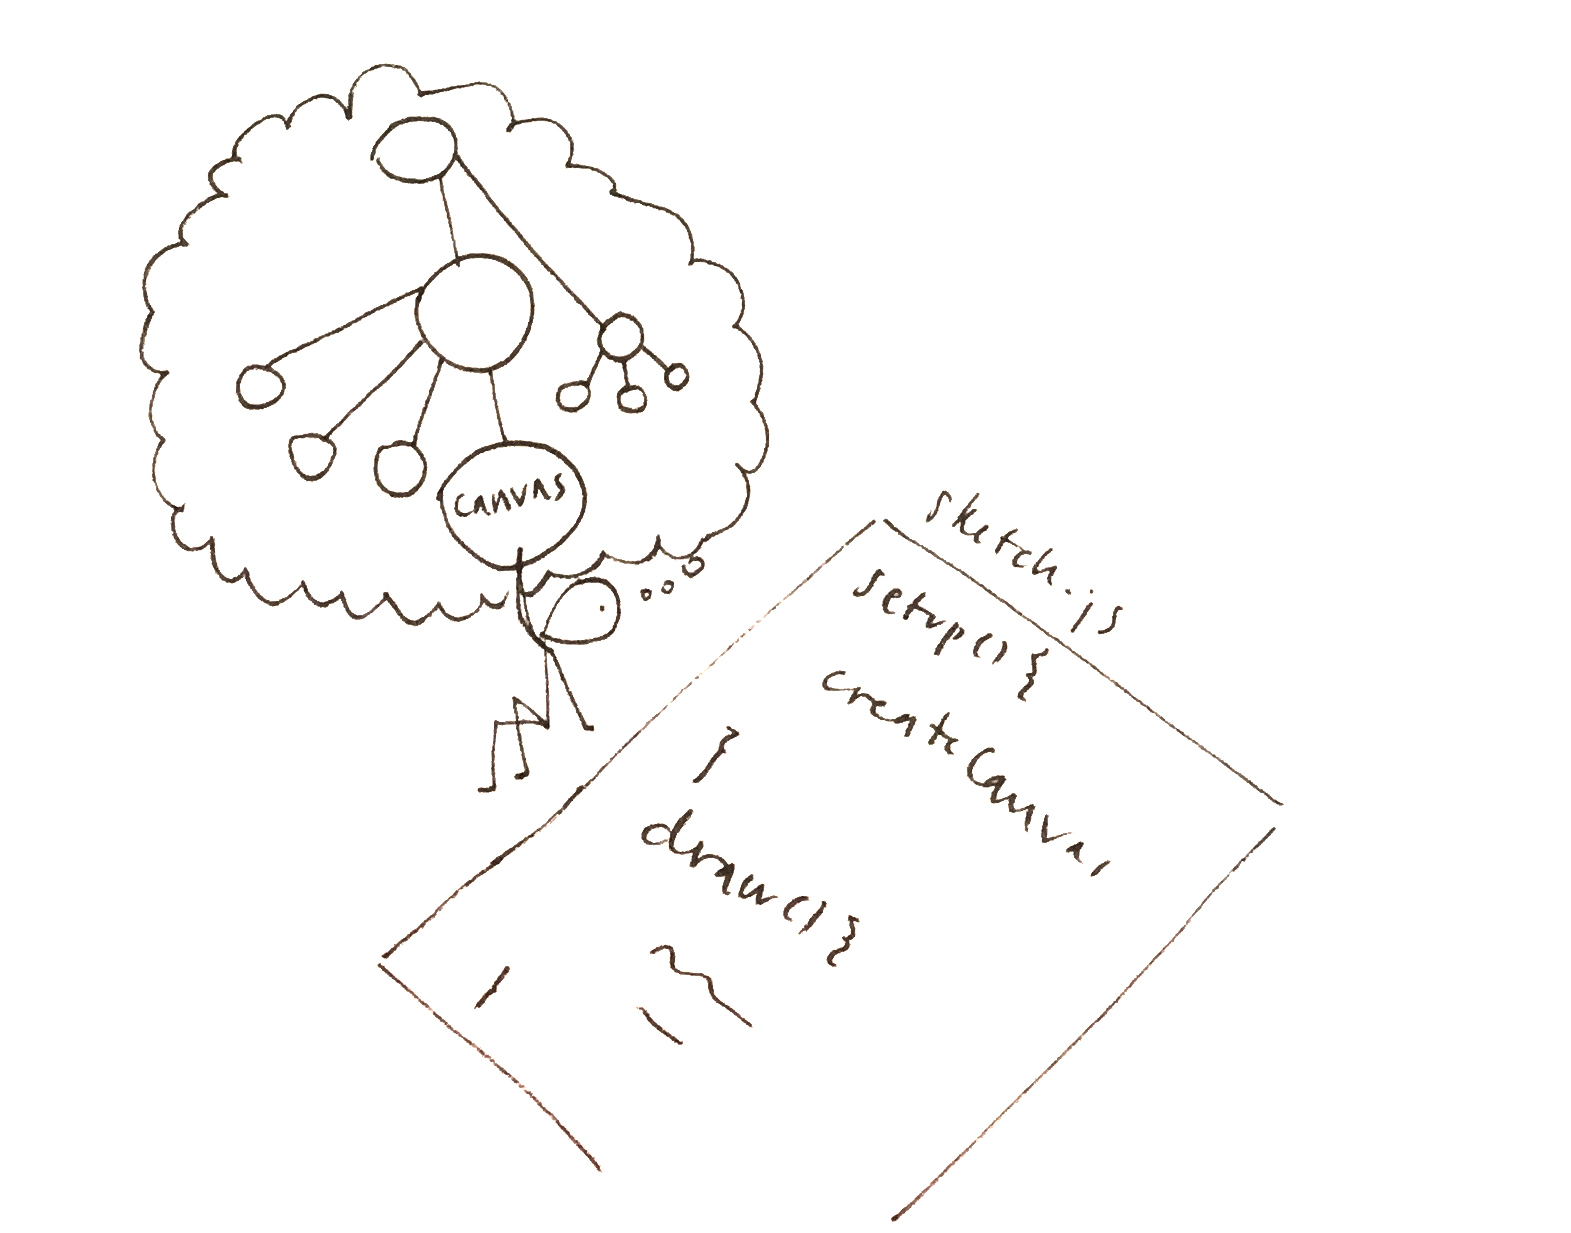
Before drawing anything on the page, the browser reads the whole index.html file to understand its structure, and builds a tree-like representation of it.
The browser goes through the HTML tags looking for begin tags that have a matching end tag. It sees the html begin (<html>) and close (</html>) tags, and creates an element for it. Then it goes over the elements inside of html, and creates an element for each of them (<head> and <body>).
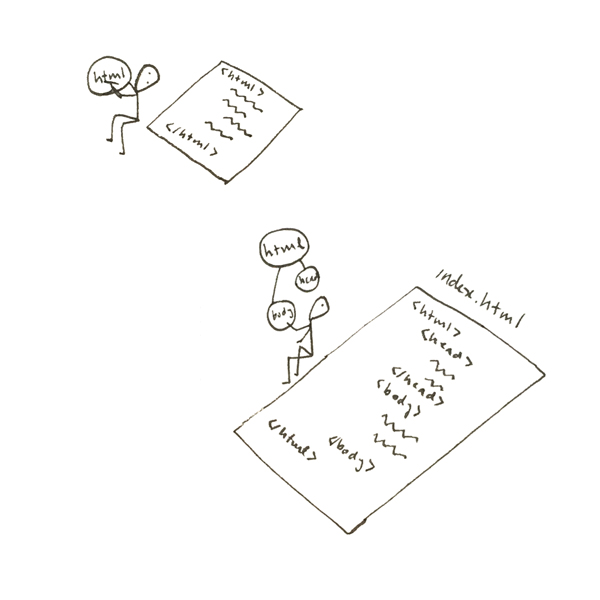
Then the browser adds the elements inside of the head element (these are scripts: it will check them for instructions later), the elements inside body (our <p>'s, <h1>'s, and <img>'s), and then the elements inside of those, if there are any. It continues until all HTML elements are included in a tree-like structure.
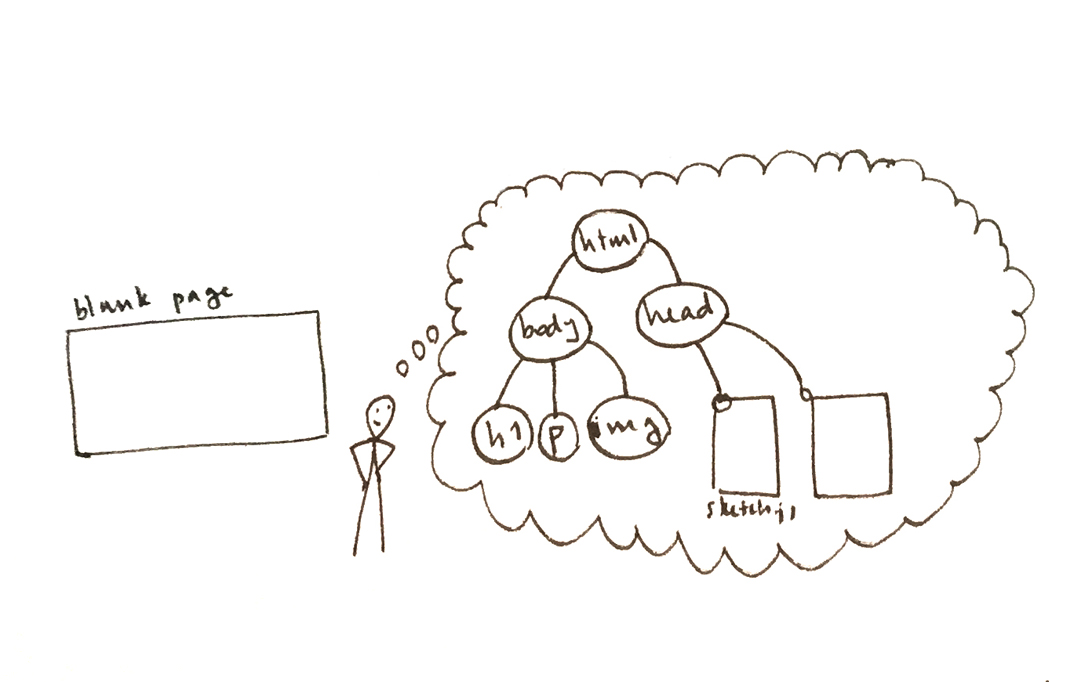
This tree structure of the page is called the DOM. This stands for Document Object Model. The browser will keep it in its memory for as long as the page is open.
From the DOM tree it has in its memory, the browser draws the page. It knows to draw header text in a larger, bold font, to draw paragraph text in a smaller, thin font, and to go fetch the image file at its source address before drawing it.
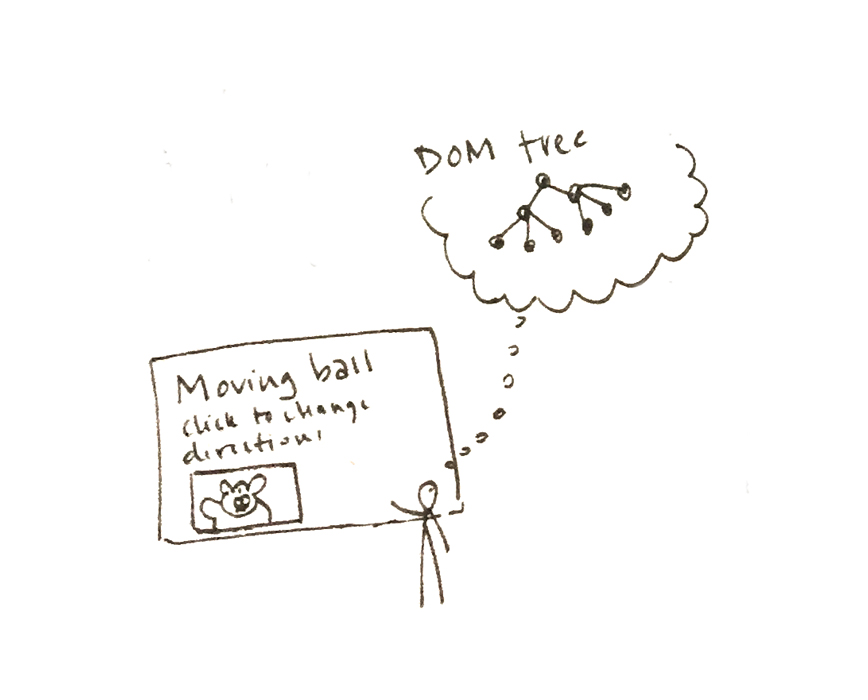
Once it's done with drawing the DOM, the browser looks at the Javascript files that index.html references for any further instructions
The p5 library takes the lead, telling the browser to run the setup() and draw() functions in sketch.js
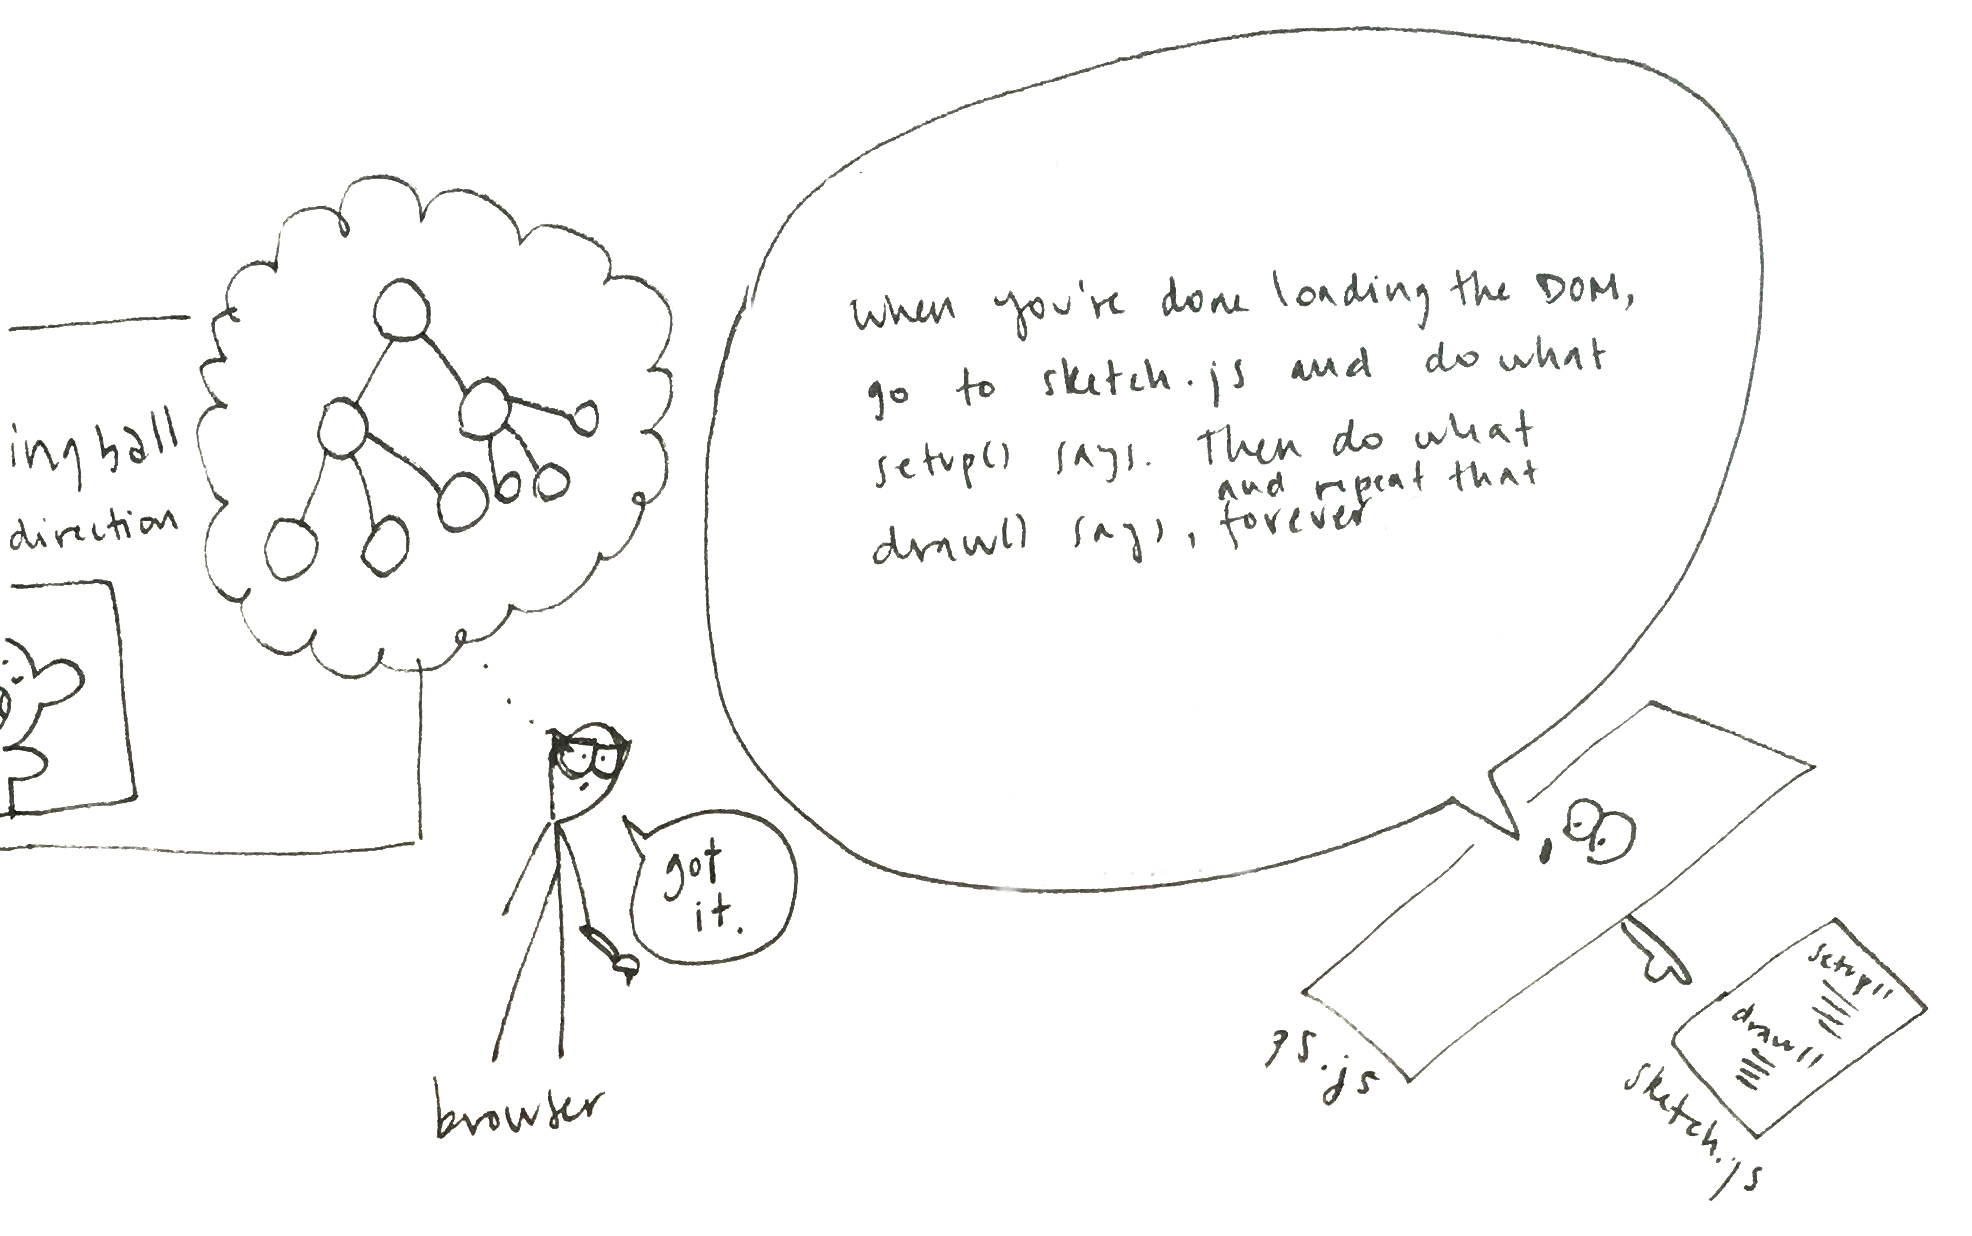
So the browser runs the setup() function we wrote in sketch.js, and finds the createCanvas line, which tells it to insert a canvas element into its DOM tree:
The browser always keeps the drawing of the page consistent with its DOM tree: now that the DOM has a new canvas element, it draws it on the page.
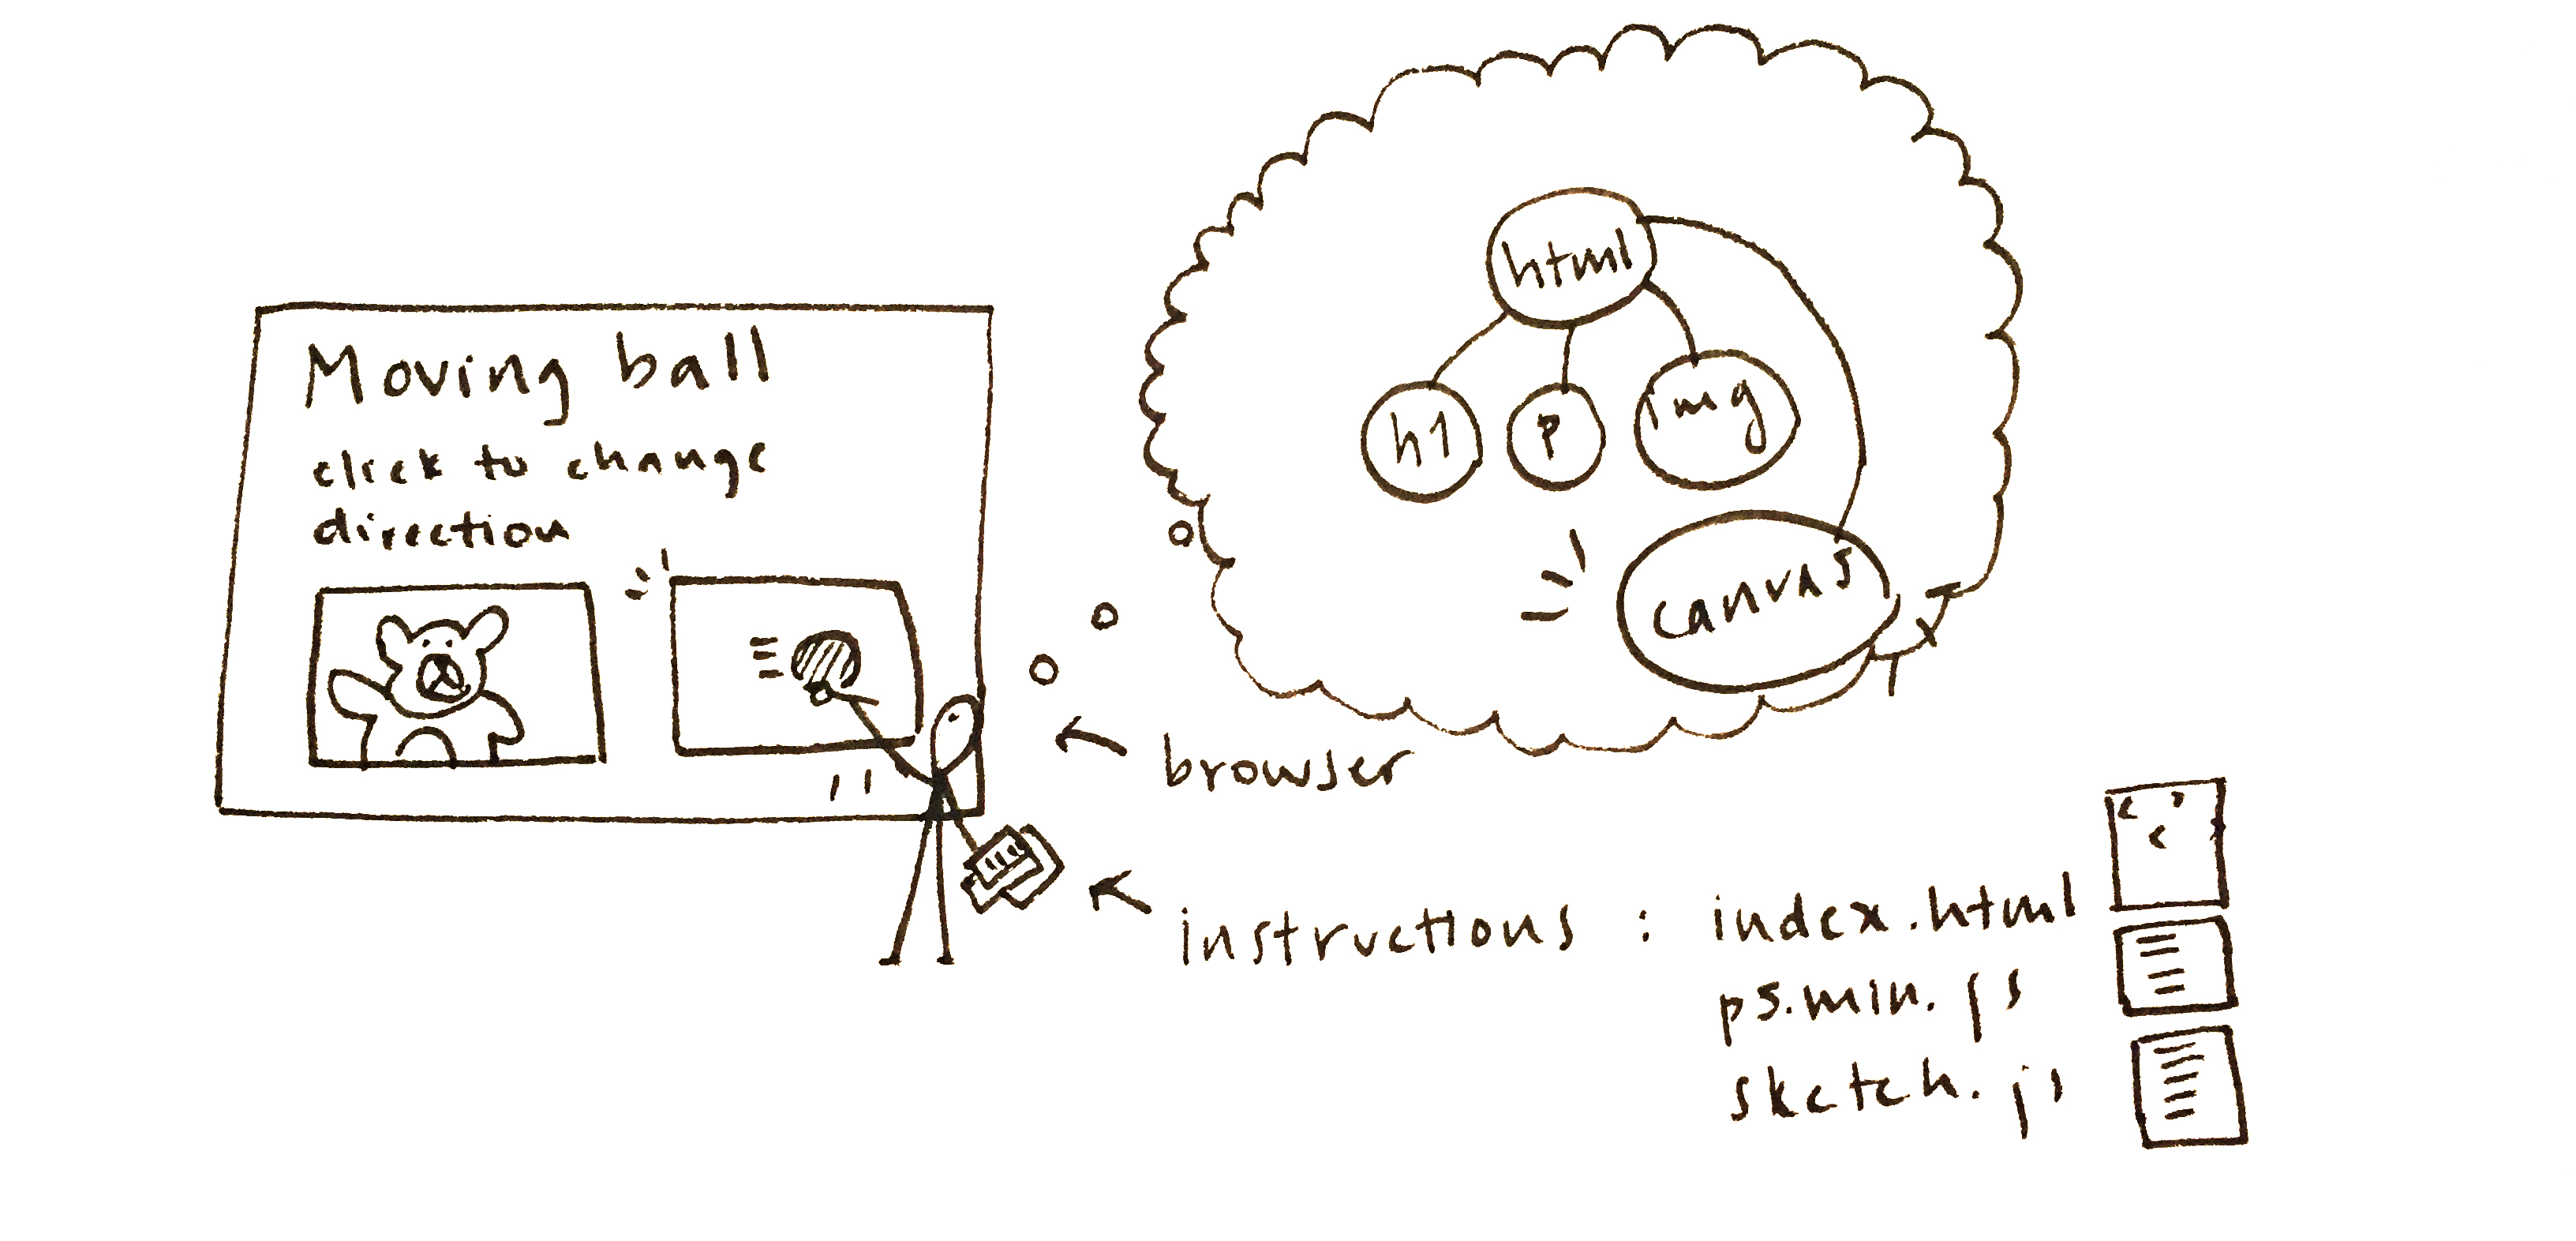
And this is how we end up with a page that has HTML elements defined in index.html, and a canvas element added from sketch.js.
The important thing to notice here is that we can add elements to a page directly on its HTML file, but we can also add elements to it by writing Javascript code. In fact, we can even change, and remove elements by writing Javascript code. This will be useful for us to change our headers, paragraphs, images, and more on the fly ––meaning after index.html has been loaded. Accessing the DOM tree from Javascript will allow us to change the content of a page in reponse to user actions, to animate elements, and more.
To add or change elements after the page has been loaded is refered to as accessing /changing things dynamically. When content doesn't change once it is defined, we say it is static. When it changes after that, in response from events from users or other systems (like the temperature changed), we say content is dynamic.
In this LA, we will add HTML elements to our page dynamically, from Javascript.
Instructions
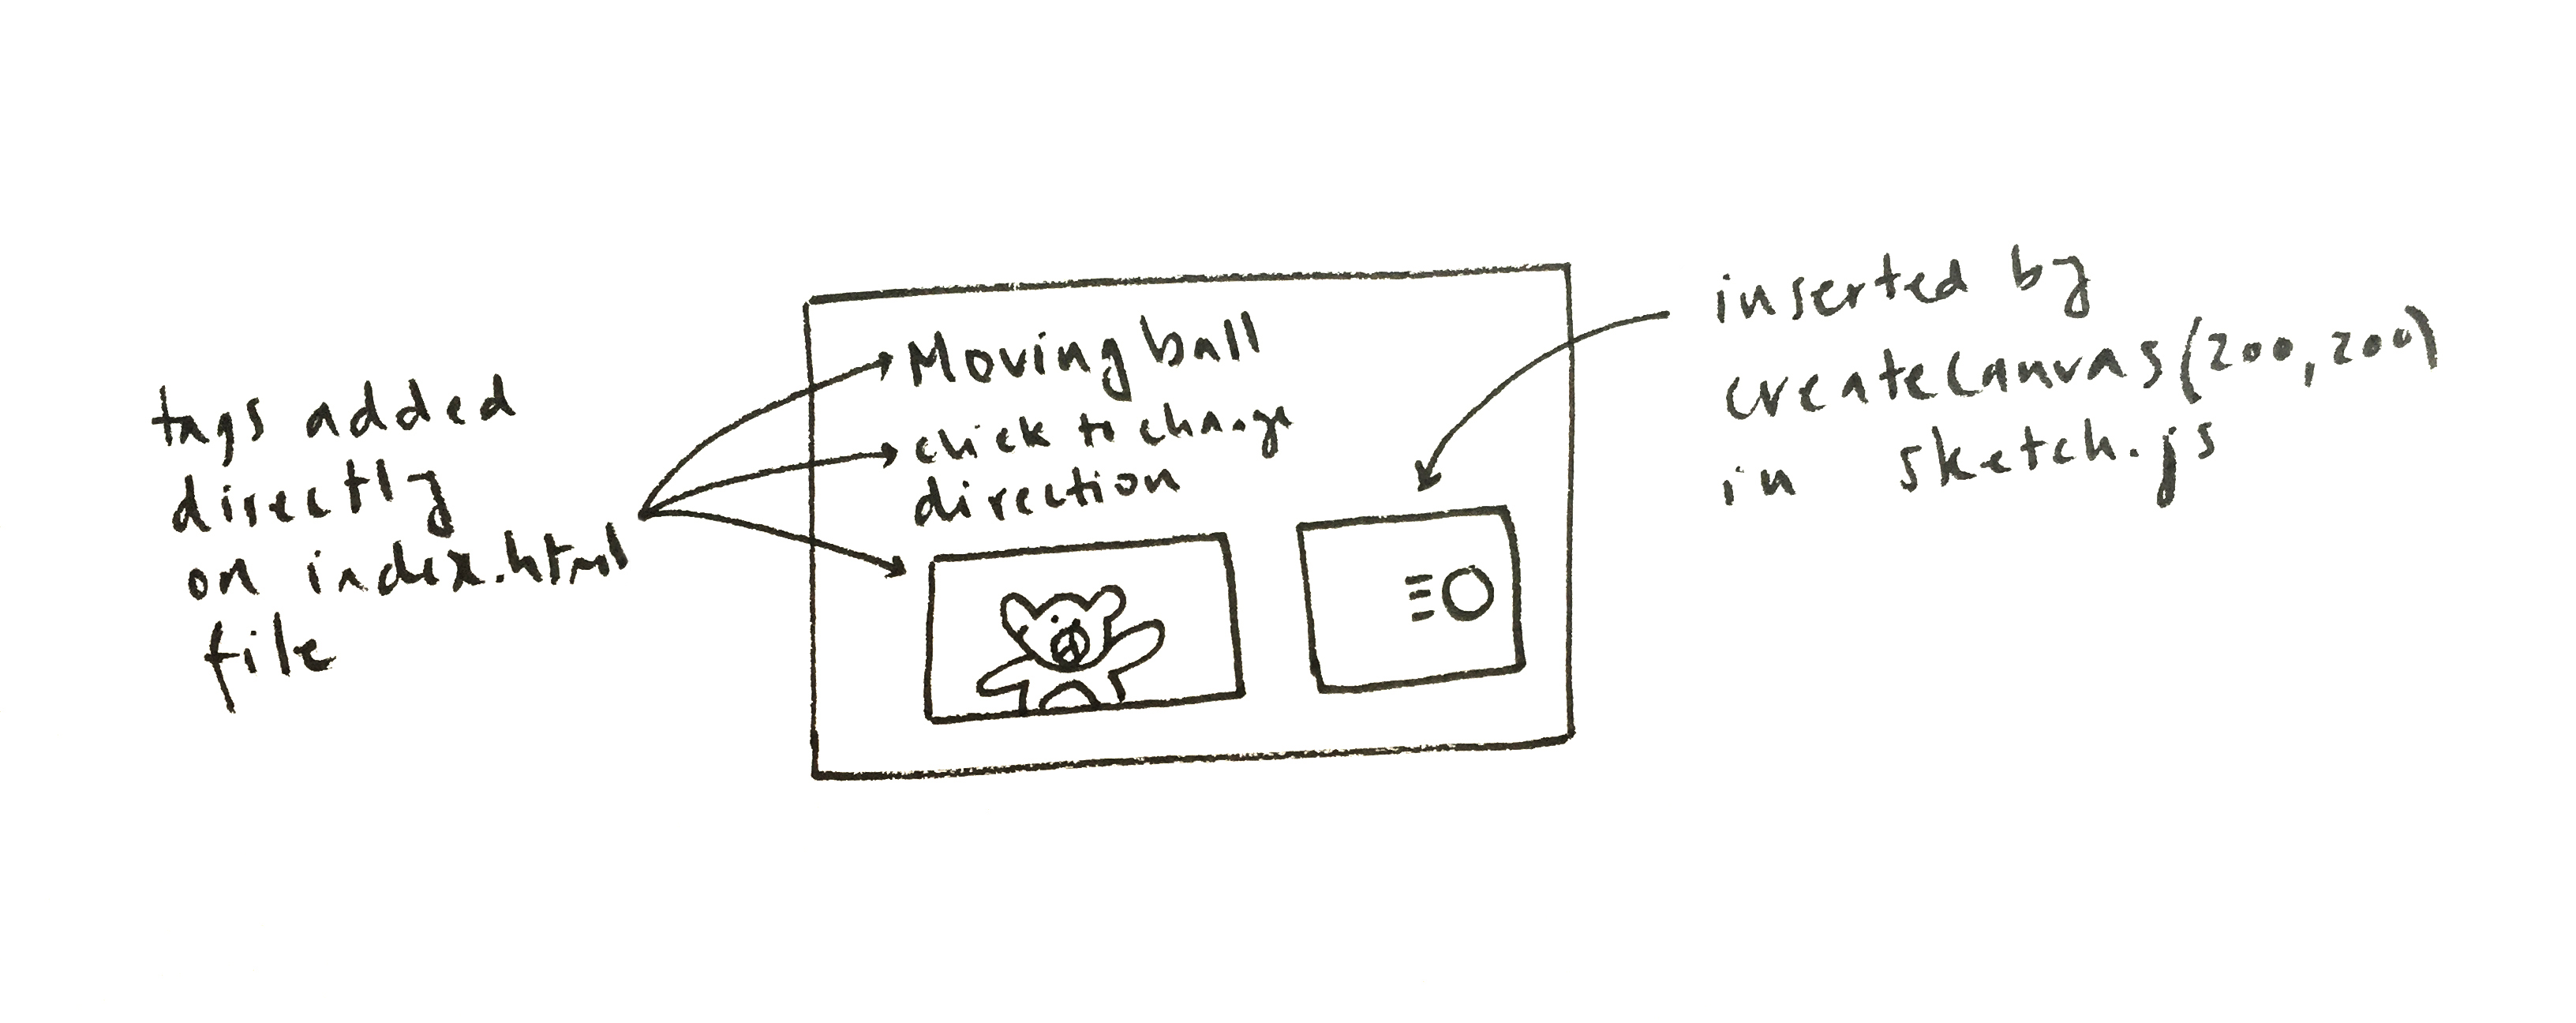
In the previous LA we created a page that had a header element (<h1>), a paragraph element (<p>), an image element (<img src="...">), and a canvas (<canvas>) element. <h1>, <p>, and <img> were added directly on our index.html file. <canvas> was added in Javascript, by createCanvas(200, 200).
Now when should we choose one method over the other? If we have a structure that will not change over time ––for example, we might always have the same title, and the same image on our page––, it makes sense to set them up directly in HTML. But if we want to create hundreds of paragraphs (as in this example), or animate them (as in this example); if we want to add a paragraph each time the user clicks, or if we want to make their content random, then it makes sense to generate them in code. This is exactly what we will do in this LA.
We can actually create all of these elements in Javascript: apart from createCanvas, p5 has many other create functions:
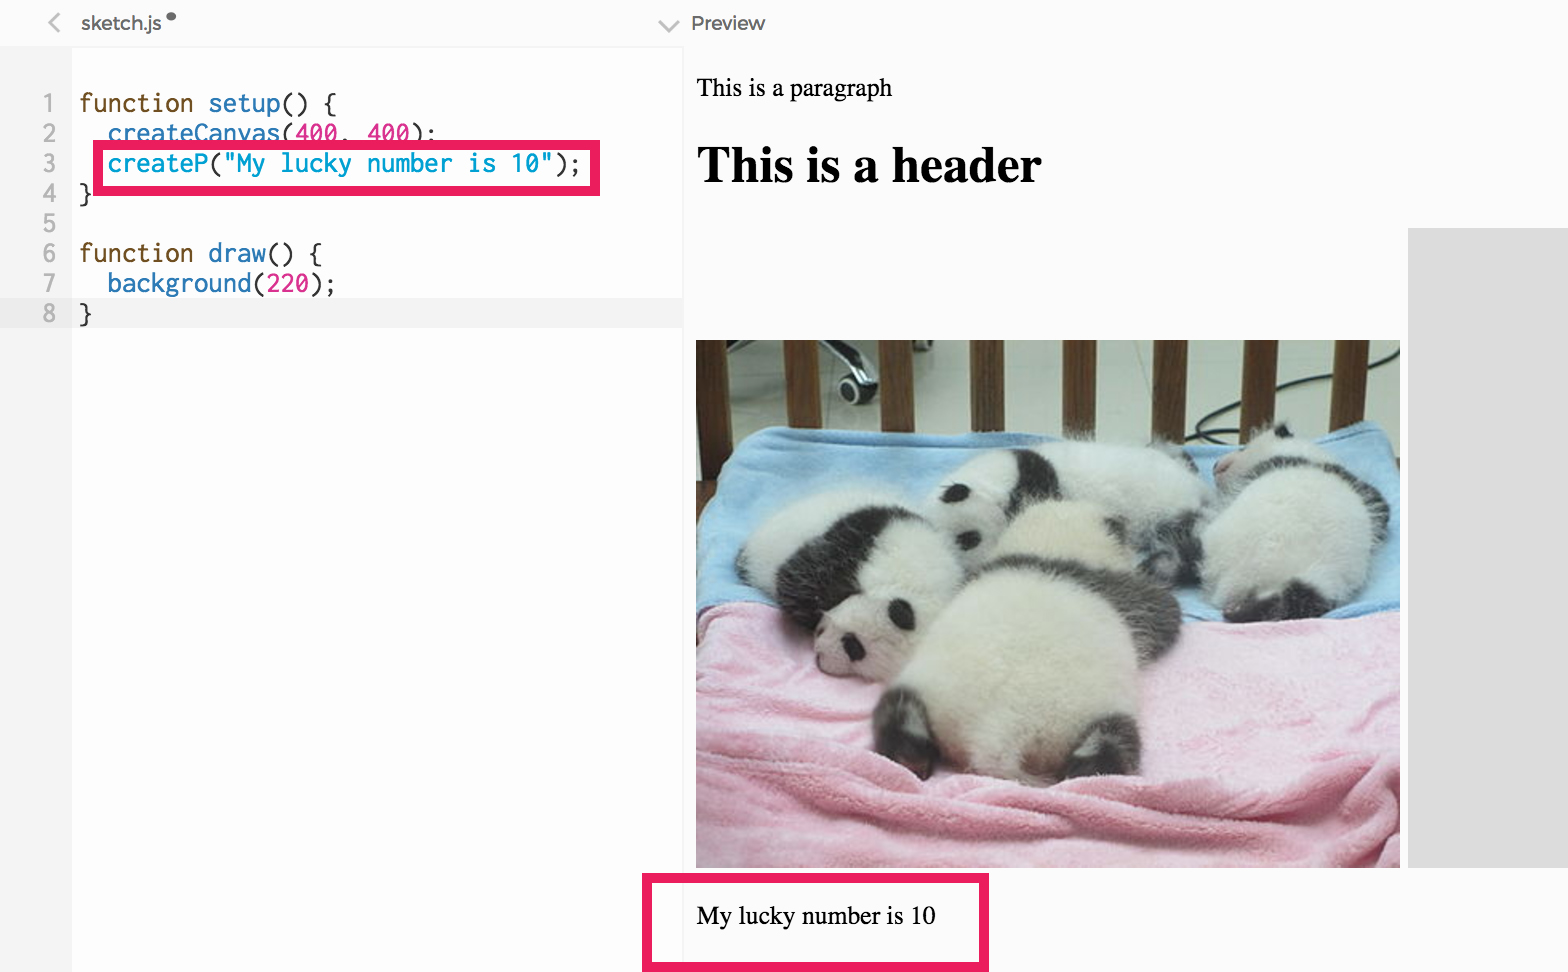
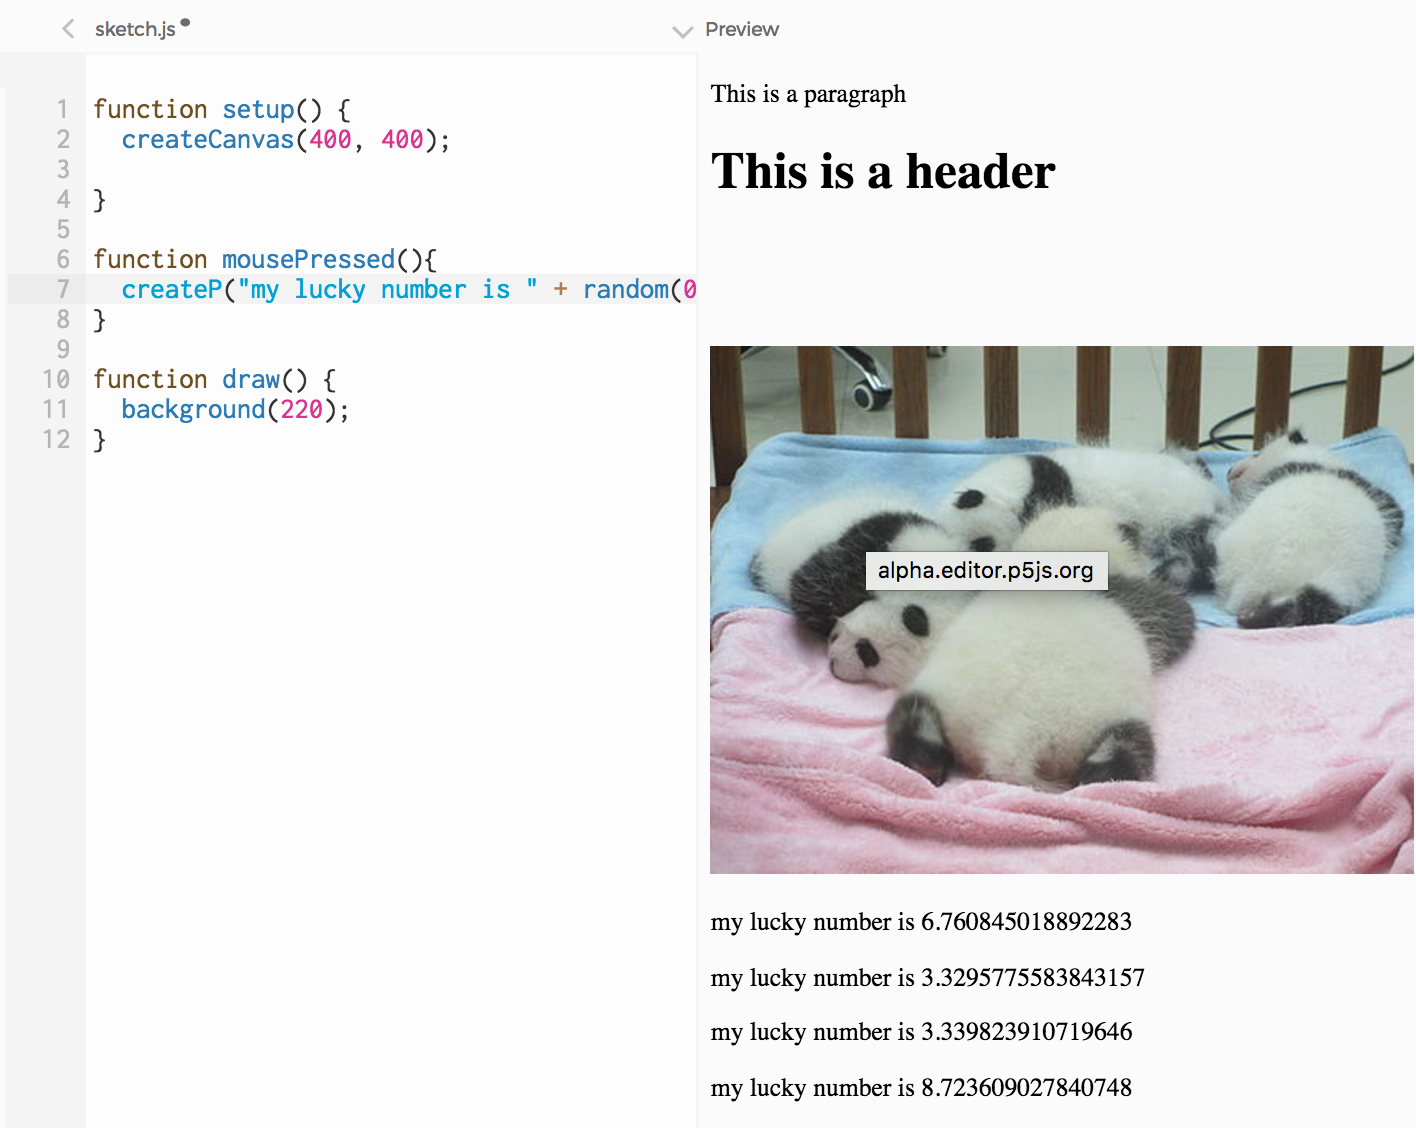
createP()createDiv()createButton()createImg()Each of these functions needs some argument inside the parentheses ––what you need to create a paragraph is different from what you need to create an image. You can look arguments up in the p5 reference page. But for now, let's start with a simple one: createP. Add this line right after your createCanvas line: createP("My lucky number is 10");
When you run your code, you will see a new paragraph added to the bottom of the page. So now we have two paragraphs. One we wrote directly into index.html ("This is a paragraph"), the other we created with Javascript ("My lucky number is 10"):
Now let's try adding more and more paragraphs whenever the user clicks the mouse (this is after the index.html file has loaded). All we need to do is take our createP line from setup, and move it to the mousePressed function, which fires anytime the user clicks anywhere on the page. Try it!
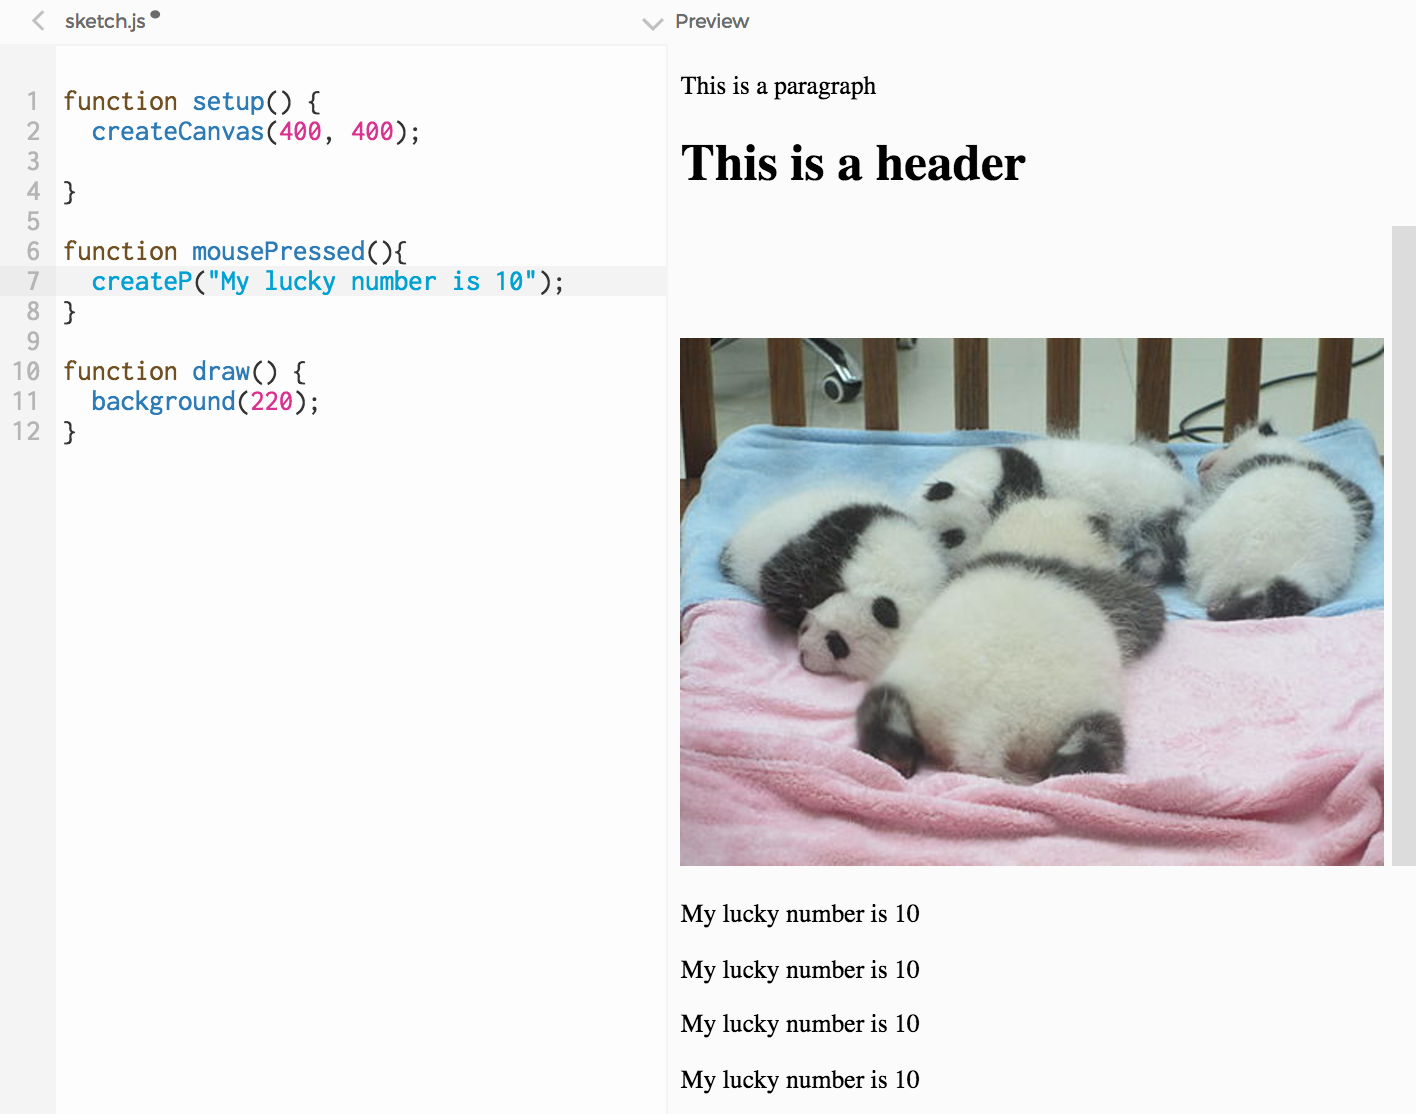
Each time you click, a new p element is inserted to the page. There is no way for us to know in advance, when writing our HTML page, how many times the user will click the mouse while on our page, so this wouldn't be possible to do with plain HTML.
Now let's change the text to "my lucky number is " + random(0, 10)". Each time we click, we will get a new paragraph with a different lucky number on it. Generating random numbers indefinitely, is another thing Javascript can do, that plain HTML can't.
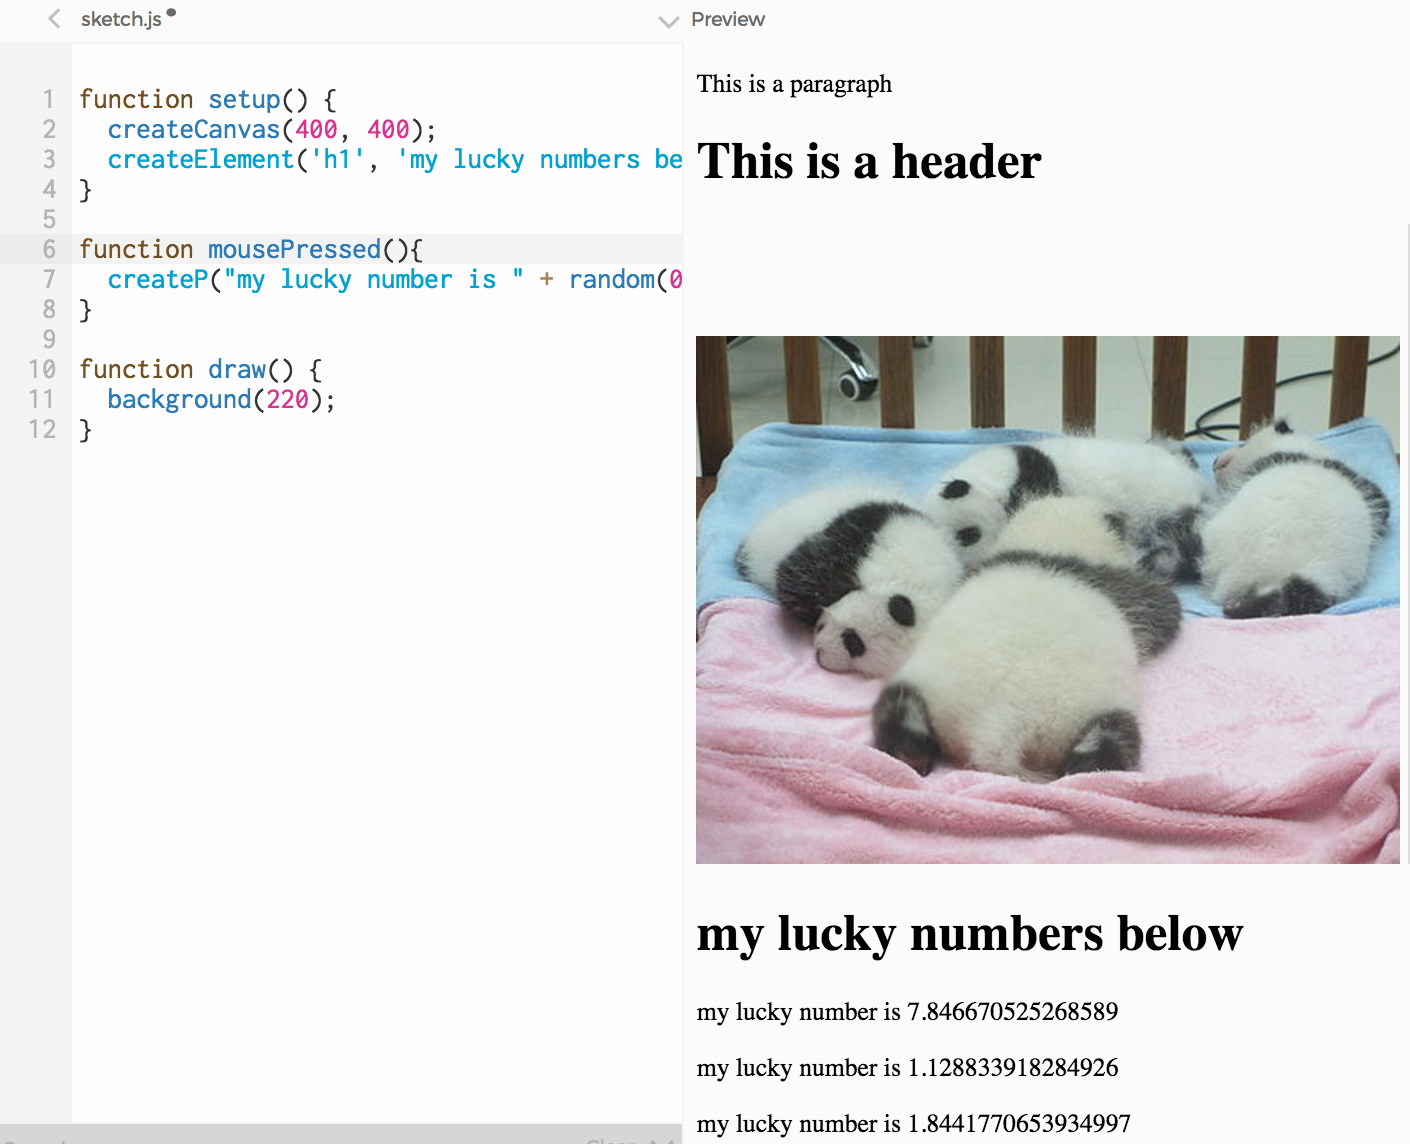
Now let's add an h1 element in Javascript. You might notice that p5 doesn't have createH1 function. There are so many HTML tags that including a function for each of them would clutter the p5 reference. So p5 only includes specific functions for the most common DOM elements that you might want to create with code:
Exercise: Add two paragraphs and two images to your page using createP and createImg. Extra: read the reference for the createA function, and add a link to your page: clicking on its text should take you to a different web page.
For any HTML element that is not on the list above, like h1 (there are many more: take a look at the full list of elements here), there is the generic createElement() function. This function takes two arguments: the first is the tag to be created, and the second the content that goes inside the tag.
For example, to add a title to all those random numbers, we can add this line createElement('h1', 'my lucky numbers below'). Now we have an h1 element we created by writing it directly into index.html ("This is a header"), and another we created by calling createElement in our Javascript code ("my lucky numbers below).
Exercise: Add an h1, an h2, an h3 and an h4 to your sketch using the createElement function.
So now we can create a page with some built-in content (in this case, h1, p, img), and then content that javascript adds to the page when it runs (a canvas, an h1, a new p element each time the user clicks the mouse). In the next Learning Activity we will look at how to manipulate DOM elements: to have them change dynamically.
Here is the complete code (click here to open it on the p5 editor):
function setup() {
  createCanvas(400, 400);
  createElement('h1', 'my lucky numbers below');
}

function mousePressed(){
  createP('my lucky number is ' + random(0, 10));
}

function draw() {
  background(220);
}